This guide will help you navigate through and use the features of the EACOMM Corporation Web-based Mail service..
Step 01: Loggin in.
Step 02: Inbox, Message options.
Step 03: Draft messages, Sent messages and Trash messages.
Step 04: Composing messages.
Step 05: Addresses, managing your address book.
Step 06: Folders, managing your mail folders.
Step 07: Options, your web mail account options.
Step 08: Search, searching through your mail.
Step 09: Help Topics.
Step 10: Calendar feature.
Step 01:
Open the Web Mail website at http://webmail.yourdomain.com, e.g. http://webmail.eacomm.com
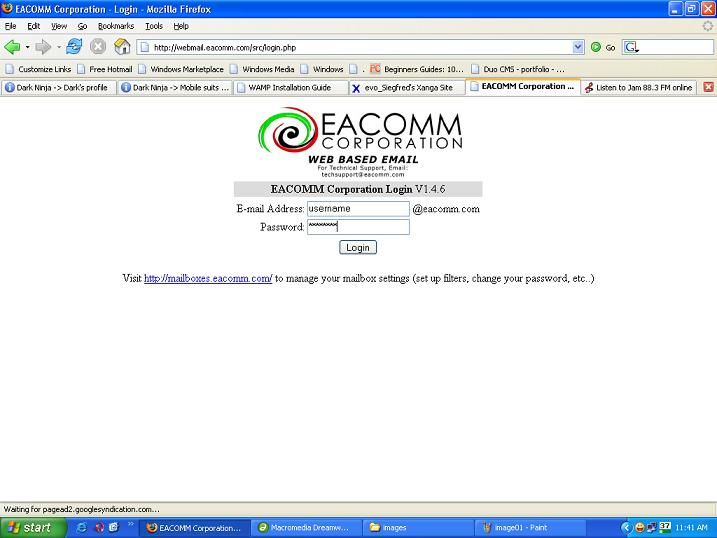
You should be able to see a page like below.
Log-in using your username and password.
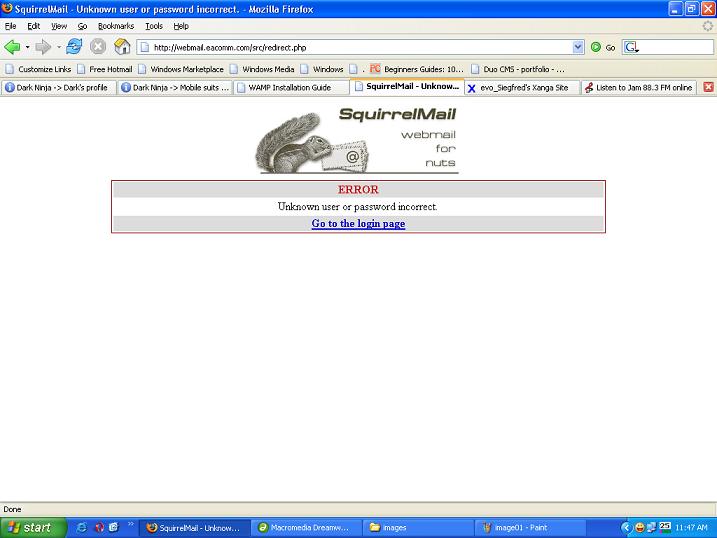
If the wrong username and/or password is typed, you will be redirected to a page like below.
Click on the "Go to the login page" link to log-in correctly.
[Back to Top]
Step 02:
After the log-in page you will be directed to your inbox.
Here you will be able to view your messages.
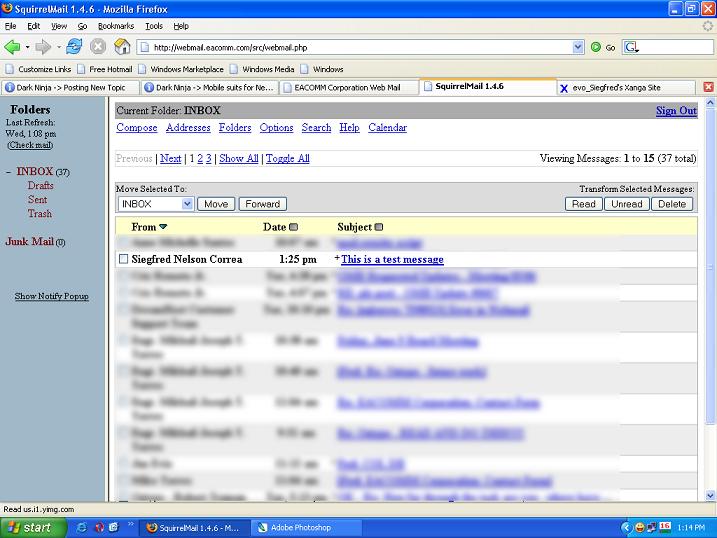
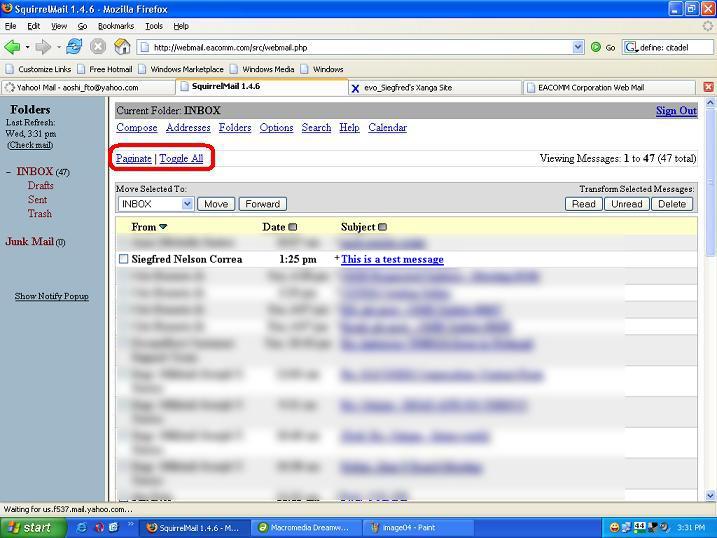
You have two options for displaying your messages. Your messages can be displayed in pages, as shown below.
If your inbox is displayed in pages you can click [NEXT] or [PREVIOUS] for either the next or previous set of messages,
or click the respective page numbers themselves.
You can also select (TOGGLE) all the messages or opt to display your messages in the second mode using the SHOW ALL option.
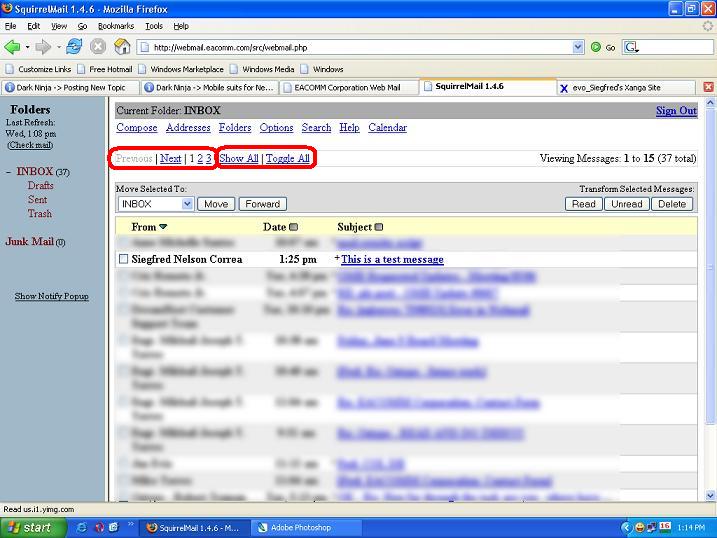
Using the [SHOW ALL] option all of the messages in you inbox will be displayed on the page.
If your inbox is displayed in a single page you can click [PAGINATE] to display your inbox in pages and,
you can also click on [TOGGLE ALL] to select all your messages.
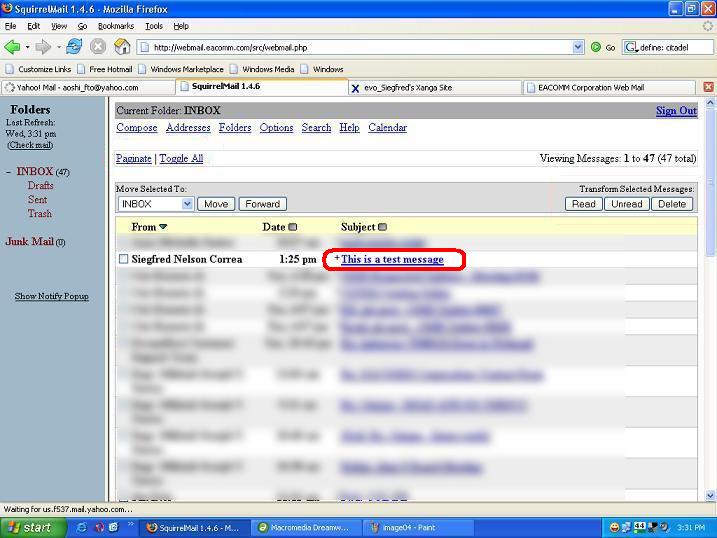
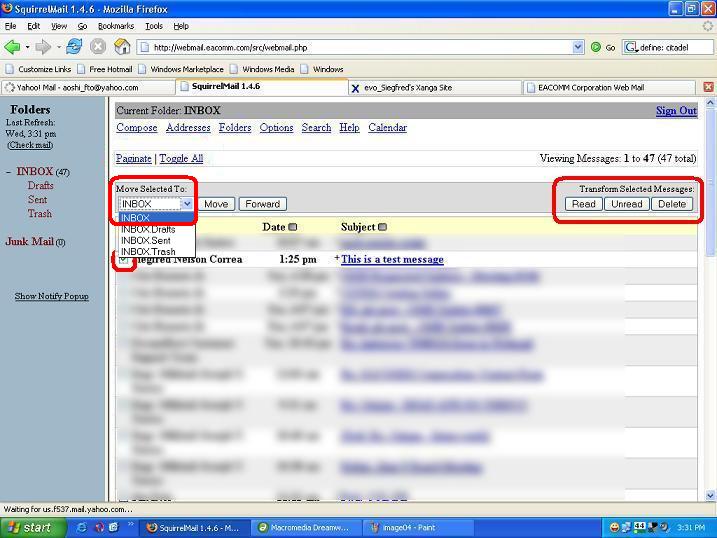
On the upper-right corner of the page you can mark any message as [READ], [UNREAD] or
you can [DELETE] the message by selecting the message(es) and clicking on the respective links.
You can also forward one or more messages by selecting the message(es) and clicking on the [FORWARD] button.

To read a specific message click on the message title to open it.
You can also move messages from your inbox to either your drafts, sent or trash folder.
This can be done by selecting the messages to be moved and clicking on the [MoveSelectedTo] option
and clicking the [MOVE] button.
If you need more help please proceed to the [HELP] link or to Step 10.
[Back to Top]
Step 03:
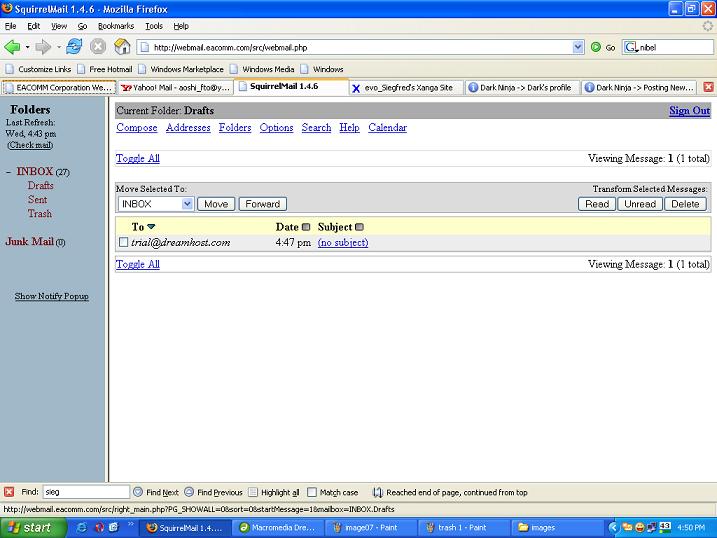
If you have made draft messages which you would want to send on a later time these could be found here.
Viewing options and navigation is the same as in Step 02.
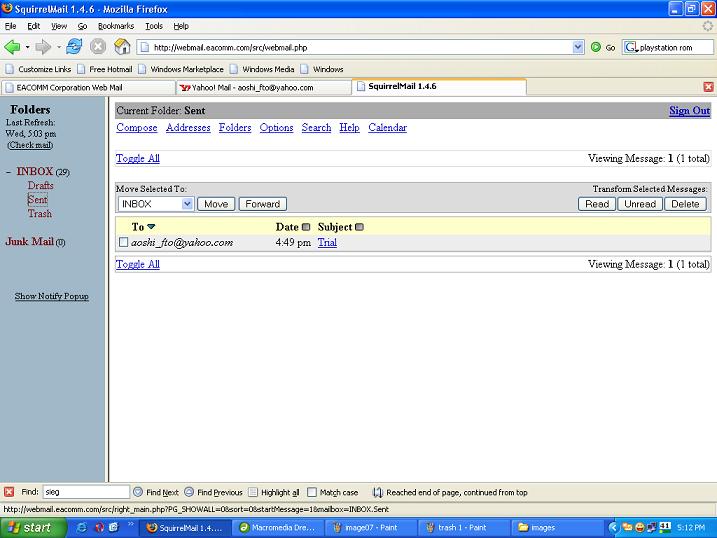
If you want to check the messages that you have sent these could be found here.
Viewing options and navigation is the same as in Step 02.
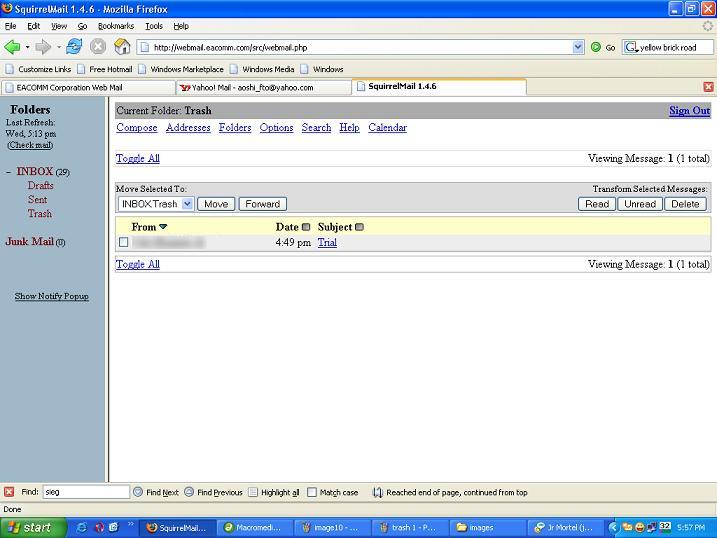
If you want to see the messages that has been moved to the trash folder it can be viewed here.
Viewing options and navigation is the same as in Step 02.
If you need more help please proceed to the [HELP] link or to Step 10.
[Back to Top]
Step 04:
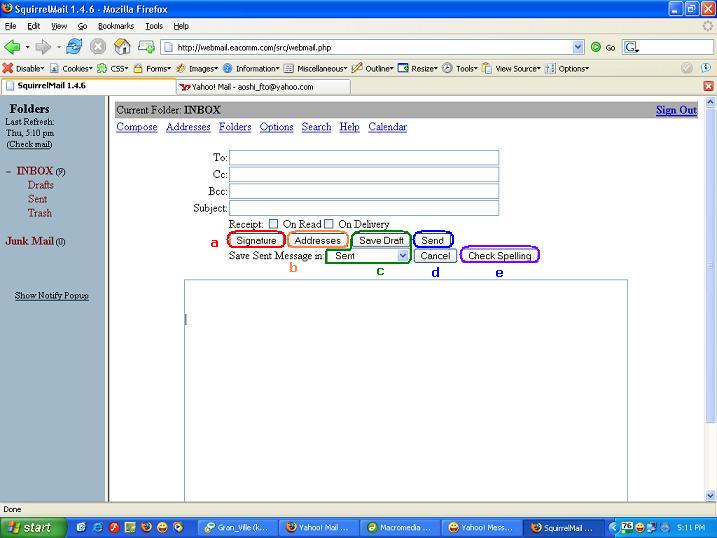
Clicking on the [COMPOSE] link on the top of the page directs you to the compose message page.
Here you can compose compose your maeesage,
a) add your custom signature,
b) insert addresses,
c) save the message as a draft,
d) send your message, and
e) check the spelling.
If you need more help please proceed to the [HELP] link or to Step 10.
[Back to Top]
Step 05:
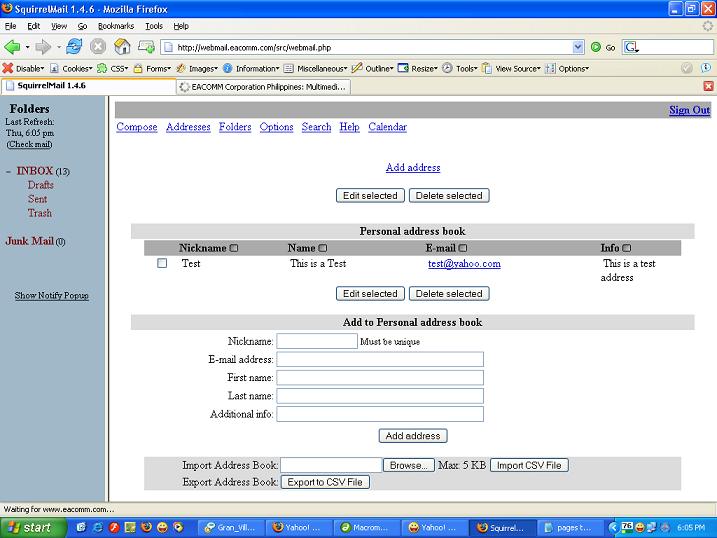
Clicking on the [ADDRESS] link on the top of the page directs you to the addresses page.
Here you can:
a) add, edit and delete addresses,
b) import addresses using a CSV file, and
c) export your address book to a CSV file.
If you need more help please proceed to the [HELP] link or to Step 10.
[Back to Top]
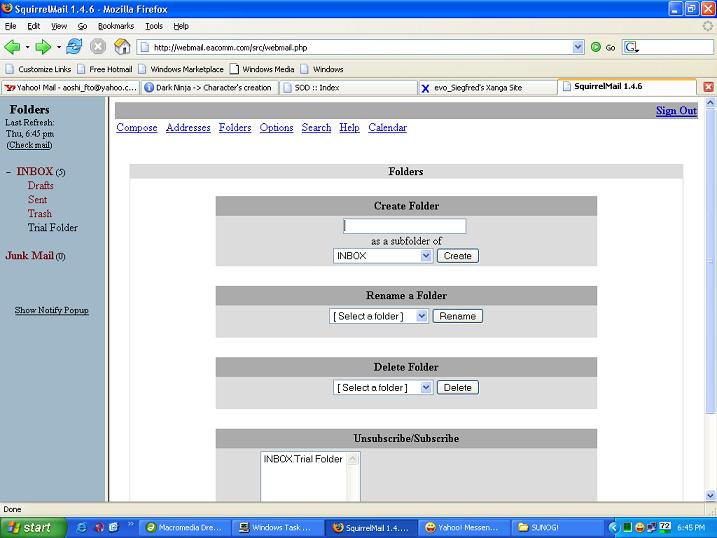
Step 06:
Clicking on the [FOLDERS] link on the top of the page directs you to the folders page.
Here you can manage your mail folders. You can create, rename or delete you mail folders.
If you need more help please proceed to the [HELP] link or to Step 10.
[Back to Top]
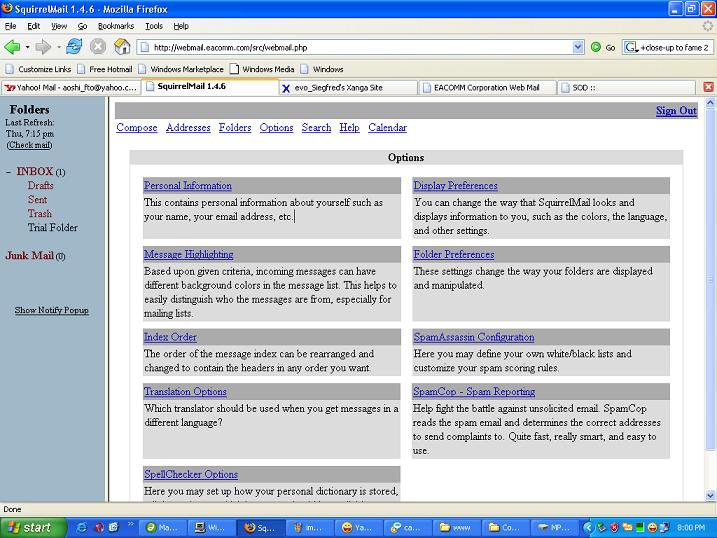
Step 07:
Clicking on the [OPTIONS] link on the top of the page directs you to the OPTIONS page.
Here you can manage your web mail settings such as your personal information, translator preferences and spell check, among others.
Just click on an option you wish to change. There are some guide texts to help you through.
If you need more help please proceed to the [HELP] link or to Step 10.
[Back to Top]
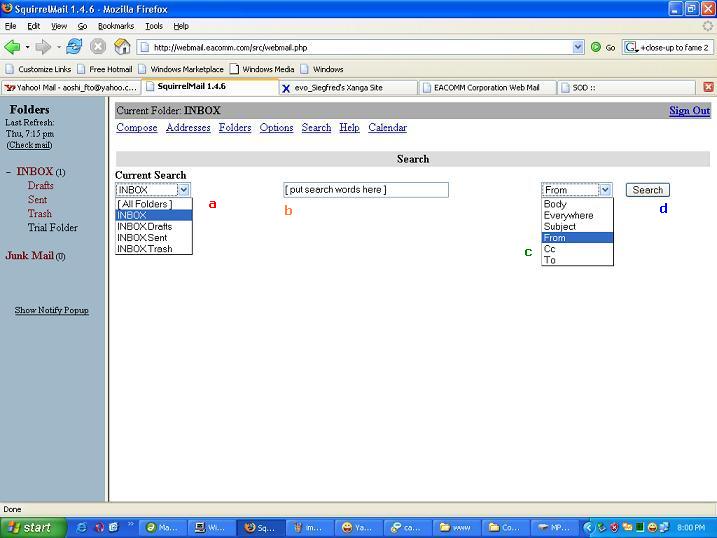
Step 08:
Clicking on the [SEARCH] link on the top of the page directs you to the SEARCH page.
Here you can search through your mail.
a) Just choose the folder to search from,
b) input the your search text,
c) select the search criteria,
d) then hit the Search button.
If you need more help please proceed to the [HELP] link or to Step 10.
[Back to Top]
Step 09:
Clicking on the [HELP] link on the top of the page directs you to the HELP page.
Listed here are the help topics for the different areas of the web mail.
Click on the [Table of Contents] for the list of all help topics.

[Back to Top]
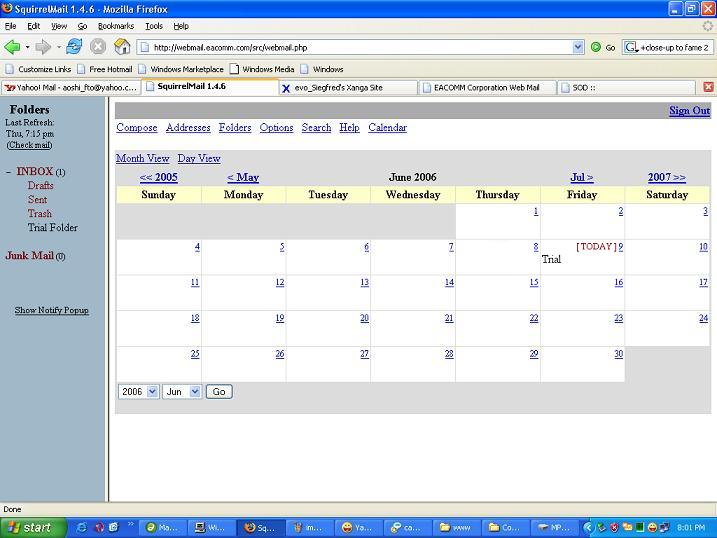
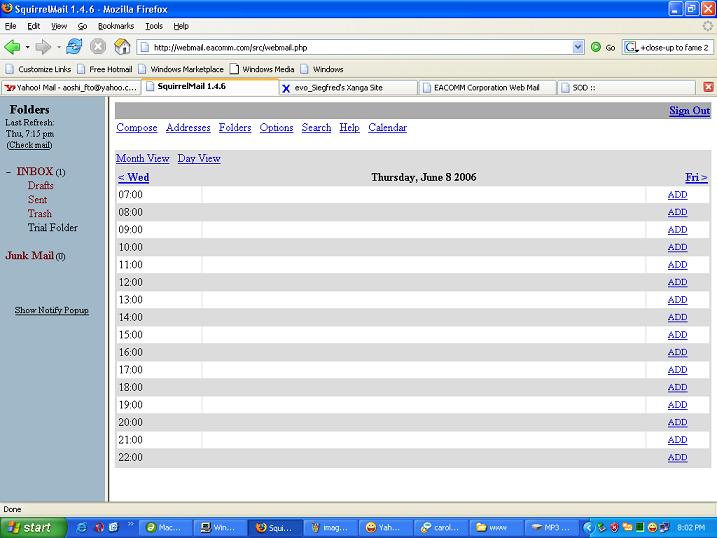
Step 10:
Clicking on the [CALENDAR] link on the top of the page directs you to the CALENDAR page.
Here you can view your web mail calendar and add notes.
This page is the Month View Page. Select any day to view its respective Day View to view and edit events.
This page is the Daily View Page. Here you can view and edit events.
Click on the [Month View] link to return to the Month View.
If you need more help please proceed to the [HELP] link or to Step 10.
This end the EACOMM Corporation Web Mail User Guide.
Thank you and good day.
[Back to Top]
Copyright © EACOMM Corporation